Posts

Showing posts with the label progress

It has been a while

Image
 It has indeed been some time since my last update on Bron Effans. I have simply not had any time free to do any work on the layout, which has not been fun. There are various aspects of the layout that have required my attention and I have addressed them over the last few days in my Christmas holiday time. I am limited in what I can do by the current Covid-based issues. I can't get to my local model shop as it is in a different tier to where I live. I am not prepared to break the rules for my hobby. I do not see the point.  I have acquired some new locomotive projects for me to be working on along with several new pieces of rolling stock to use on the line. I have taken delivery of two custom pieces of stock, built by my good friend Leigh Hullatt. They are decorated with the initials of the line BER for Bron Effans Railway. Rolling Stock I have obtained a Bachmann Narrow gauge coach to compliment my burgeoning Talyllyn rake. This coach is exceptionally well made. I am pro...

Walling off my summer.

Image
  I have had a fairly productive summer break from work. My time has been divided by various jobs on the layout and catchup repairs from the lockdown period. Ultimately, I had set myself some targets for the summer period to improve the running of the layout and to sort out the ongoing issues with the rolling stock. I have managed to finish the vast majority of these jobs and have finished a few other extra things that were not in the original plan. The biggest of which is the new retaining wall at the west end of the line.  I have been trying to give the layout a more unified look and feel that reflects the location that I am trying to model. I found some inspiration from the creation of a group on Facebook concerned with modelling the Corris Railway. I took ideas from this group and set about building a retaining wall along the northern slope to disguise the poor effort on the slope. The first layer of styrene is laid. I used styrene to make thin slabs and built them up with...

Five79 kits aka The Corris Coaches

Image
  I have found been hunting for a kit that could be used to represent the coaches that are used on the Corris Railway. I wanted something that could be used to match with the new Tattoo locomotive and used with the Talyllyn outline stock. I had sold the original short bogie set to make room on the roster for these new carriages.  I was impressed by the quality of these kits and set about building them. There are some quite noticeable differences between these kits based on the Innisfail Tramway and those of the Corris Railway. My aim was to use them as a resemblance as they have a single doorway and two vestibules for passengers. I did not see the need to adapt the kits for my aims and I found the kits detailed enough to pass as older coaching stock. I put the kits together fairly quickly and primed them with Humbrol primer. The bogies for these kits are some of the best that I have built for a plastic kit. The wheels were free running and the couplers were easy to attach....

Refitted Carriages

Image
I apologise for not posting as regularly recently. I am on my summer break from work and that has meant that house jobs and other things have come to the fore. I am working through the list of summer jobs for the layout and those for my house.  After several weeks of pondering and debating on what to do with the newly acquired carriages, I took the plunge and set about the refitting of the Austrian carriages. The initial plan was to repaint them into BR Blue and Grey however something was holding me back from travelling down that road. I decided to go down the more traditional BR Maroon route after seeing a picture online that showed a maroon dining car. Image taken from Google. This image prompted me to begin the process due to the recessed doors looking the part. I took the carriage to pieces and set about removing the printed on details using a fibre glass scratching brush. I then used Railmatch BR Maroon spray to add two coats on to the carriages.  I masked off the carriag...

Plans for the Summer

Image
I have finished work for the summer and have decided that it is high time I spent some quality time on the layout. There are a number of issues that need to be addressed in order to make sure it is fully functional.  Electrics I find myself being haunted by the ghost of poor electrical fidelity. There is a weak link in the circuit around the points. I am intending to solve this using some proper track cleaning materials. The track has not had any proper use due to there being a considerable lack of power to the northern platform and the siding. This all stems from my over exuberant use of pva glue when I ballasted the track. I plan to get some proper track cleaning solution to sort this out and hopefull restore the running to what it used to be like. I am guilty of neglecting this aspect of the railway but due to lockdown I haven't been able to go out and purchase the items I need to resolve these issues. Carriages I have been looking through the very large selection of...

Little Iffy Jobs

Image
I found some time in the morning to work on those jobs on the to-do list with the fleet, that I had been putting off for some time. These are the sort of jobs that I know I should complete by once I have a piece of rolling stock that can travel in a train I just leave them as they are. I will be open with you, I hate glazing carriages. It just does nothing for me and the potential for getting it wrong is great. Making a mistake with the glazing can ruin a carriage, in my opinion, which is why I constantly put it off. Anyway I decided that it was finally time to finish the Dundas observation carriage Kit-bash for the eastern end of the Short Bogie Rake. Add caption I cautiously fitted the glass and left the glue to cure. I only use a few small dots of plastic glue on windows so that it does not smear everywhere and ruin the windows.  Whilst this was setting, I noticed that I hadn't painted the roof of the carriage during construction, like I normally do. I took the opport...

Manning Wardle

Image
I decided that, with the lockdown taking effect, it was time to bite the bullet and begin the construction of a locomotive using the spare Graham Farish Prairie tank locomotive. I was in two minds whether to purchase a Roxey Mouldings 'Troodos' locomotive kit or a Rodney Stenning Manning Wardle locomotive kit.  I decided on the Manning Wardle over the other kit because I was not sure whether it would actually be in gauge on my line and, deep down, I have always really wanted a Manning Wardle locomotive for my railway.  The kit itself was very straightforward and only required subtle alteration to fit the chassis.  I added some additional details to the loco using brass rod to form the handrails and the steam pips that proliferate the sides of this locomotive.  I built a backhead for the boiler using plasticard and various other odds and ends to imitate the look and feel of a working cab. I must confess I did make ...

2080 Interior

Image
I have finally got round to constructing interiors for the 3 Liliput carriages that I bought last year. I wanted to fit them out in a similar manner to those that operate on the Welsh Highland Railway. They are set out in a 2 + 1 formation with two seats on one side and 1 single seat on the other. In Ffestiniog and WHR parlance this is known as the clock side. I had originally aimed to build the interior for the pullman carriage today, however I was unsure how to build high backed chairs that are on the WHR. I took the decision to fit out the "Brake" coach for this rake and set about the process of building the interior with the plasticard. I cut three identical flooers for the three coaches and went from there. The basic interior was driven by the need to have a toilet cubicle at the rear end of the carriage as it travels up the line. I started with that as my basis and then worked from there to try and keep the seats the same size and level.  I then added small str...

Into the West

Image
I have finally begun the construction of the western end of the layout in order to create a backscene to hide the fiddle yard. I had been putting this part of the layout off for some time, owing to me not being able to make my mind up on how I should disguise the portal to the yard. Originally, I envisaged a simple portal in a board which could be hidden with a simple footbridge over the cutting. I couldn't figure out a way to make this look convincing especially due to all efforts to build a footbridge resulting in wobbly and misshapen disasters. Inspiration struck me when I found a suitable portal on a well known auction site. This resin fascia looked very similar to the ones on the Moelwyn tunnel on the Ffestiniog railway and, given the reasonable price, would be perfect for the entrance/ exit on the line.  I mounted the board to the layout and attached the fascia to see how it would look with the cutting. I added some cardboard over the gaps between ...

Crossing the line

Image
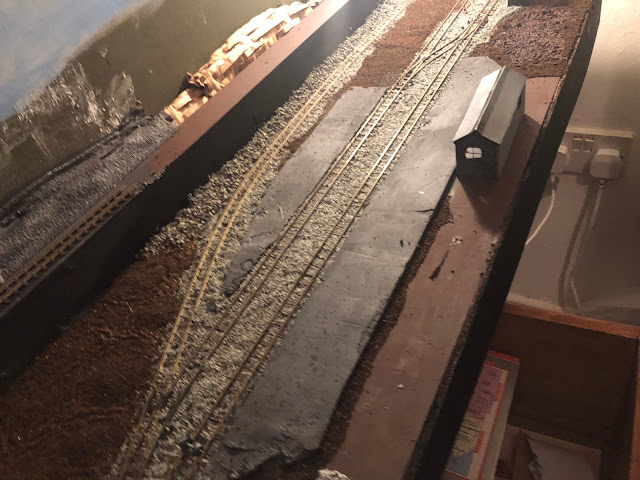
In my continuing effort with the scenery I have made a simple crossing for the railway. The boards are made from mounting board for picture frames. I cut it into strips and glued it directly into the sleepers. My mistake was to leave the board unpainted before mounting which wasn’t a good idea. I have since painted over it in brown to simulate wooden planks. I think it looks rather good for a first attempt. Now I need to replicate this on the opposite side of the track to form my basic crossing. 

Road Building

Image
I have continued to build on my recent enthusiasm and continue construction of the country road/ track that will form the main access to the station. I have continued in much the same vein as previous construction with the coverage of PVA and then sprinkling the scenic material on top of the glue. This has thus far yielded some pleasing results for me. 

Structural issues

Image
As part of my work to bring the Vale of Rheidol and NWNGR Carriages to a good standard, I have had to overcome some issues with bowing in some of the carriages. It was worse on VoR No.2 where the lack of seats had produced a severe warp along both sides of the body.  I have attempted to remedy this by adding in the benches to reduce the warping, which seems to have had a positive effect. Howver, I seem to have misplaced 3 benches for this carriage, which means I will need to source some new benches once funds become available.  In other news the detailing on 24 and the other VoR Carriage has taken a pace with the construction of their seating and a refreshed paint job.